
Bokeh Me
Happy New Year to you all. I know, I'm somewhat late to the party and I do realise that we are already at the end of January and this is my first post of 2019. But, this is not to say that I have been sitting back watching the first month of this year pass me by. I have been beavering away and stock piling images to share with you. So with that said let me introduce the first "Creative Process" of 2019.
If you have been following me you will have heard me say before the importance of meeting with like minded creatives and collaborating to produce new work, or simply taking time to develop and perfect new skills. Well, this is exactly what I did to achieve the photo I've used in this post.
The model for this shot is Alexandra Frances McCue - find her on Instagram @alexandramccue - and this was taken as part of a photo shoot arranged by a couple of the admins of a Facebook group I belong to.
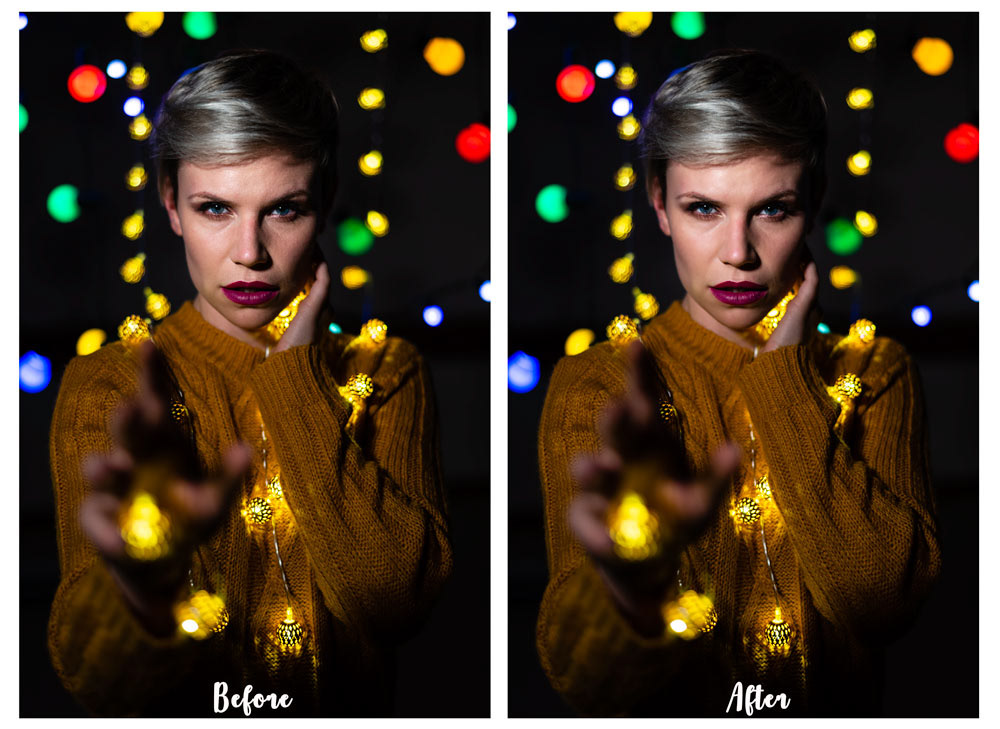
Lets take a look at the final image:

So, how did I get to this.
Equipment.
Nikon D750
Nikkor 50mm
Handheld
2 x Rotalight ring lights
Camera Settings
ISO 125 / 50mm / f1.8 / 1/60 sec.
The Set Up

As you can see from the photo the lighting in the background isn't as depicted her in the diagram, the lighting used for the shoot were your normal Christmas type lights that you can pick up from any hardware or garden centre. Also, the lights shown in the diagram are positioned just to show you how they were set up, as I mentioned before I was using ring lighting for this shoot.
The Editing Process
Lightroom:
Photoshop:
Healing brush before softening the skin. To see how I achieve this go to the photoreceptorcell YouTube channel where I put together a step by step guide on how to achieve this.
So as you can see, really only some minor alterations for this shot overall. The biggest edit was softening the skin of Alexandra's face. I will point out that this wasn't because she had bad skin, far from it. The hall in which we were set up was extremely cold, causing the skin to react naturally to the surroundings in order to protect itself.
As I look back on this shot, for the best part I am pleased with how it came out. Given the opportunity again I would have provided more rim lighting to the top right of the head in order to pronounce this area, further separating it from the background.
A few extras from this shoot


Conclusion.
I hope you found this post useful. I aim to share posts like this regularly, so if you found benefit in this, consider following me so you don't have to remember to check back as you'll be notified every time I post something new.
Also, I've set up a closed Facebook group that I've called Corpus Callosum. The concept is to bring creators together, for us to share ideas, to showcase our work, collaborate, ask questions and learn from one another, to discuss concepts and to refer work between us. I'd love for you to be part of the community.
Until next time.
Gary
Be Creative. Be Inspired. Be You.
e : gary.fernon@photoreceptorcell.co.uk
Resources:
Lighting diagram from; www.lightingdiagrams.com